Portable Face Finder
As a side project I’ve been working on a portable Python program to find if specific people, using facial recognition, are in a collection of images. The idea for this grew out of a joke but the more I thought about it I realized it had some real applications.
A co-worker of mine was having trouble finding images of specific individuals within a large folder of images. Over the years this folder had gotten overgrown and photos were in random sub-folders sorted by date, location, or event. It was hard to find photos of specific people without digging through a lot of images to see if they were in them. I jokingly suggested we use some facial recognition software to comb through the folder and just flag all instances of the person they were looking for. I held on to the idea over the next few days thinking about how something like this would function.
The idea itself is pretty boilerplate stuff for any image tool, like Google Photos or on Facebook. These will recognize the faces and do all the heavy lifting for you. My real interest lay in situations where having an offline solution to this problem would be useful. Family pictures on a parent’s computer or in this case employee photos not part of a unified imaging solution. I imagined there was some utility being able to throw in a USB drive, launch a script, and identify photos of interest based on looking for specific faces.
Crowd Sourced Quote Generator
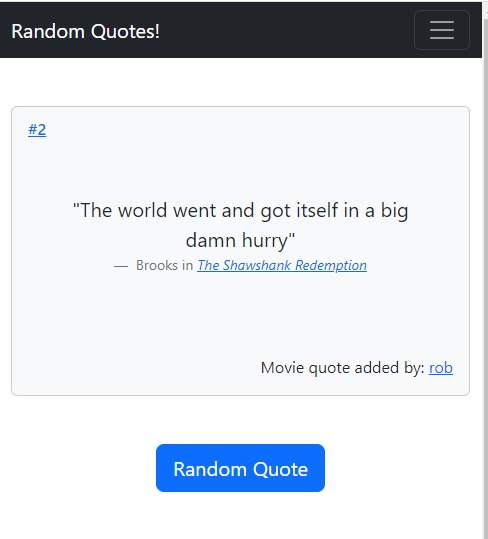
I have an LED Sign in my office that displays information like the weather, currently playing music, and other stuff. One day I added a random movie quote to the rotating text just for fun. A few days later I swapped it out for another one. As you can imagine, an idea hit. What if I could randomly add a new quote every few days? There must be a web service to pull quotes from, right?
Hence began my search for an existing service to pull movie and TV show quotes from. I found a few options, but I came up short of what I wanted. Many sites cataloged movies, but not quotes. Others had quotes but no method to pull them programmatically. The IMDB in particular looked the best but their “quotes” were often several lines of dialog from the film. Plus I just didn’t want to mess around with integrating with them since it’s a proprietary site.
At this point I figured I could either a) drop this idea or b) try and build something. Something as simple as text file with a bunch of favorite quotes in it would have worked but I didn’t want to have to generate all the content myself. I thought it might be fun to build something my friends and family could add quotes to as well. It would have the added bonus of making the quotes more diverse than just things I thought up.

Automate Doorbell with ESPHome
Disclaimer: This is not about replacing your doorbell with a video camera doorbell using an ESP32. There are lots of tutorials about doing that if that’s what you’re after.
For a long time I’ve hated my doorbell chime. It doesn’t get used much, but when it does I hate it. The noise is annoying and over the years our dogs have picked up on it and it triggers them to rush to the door when they hear it. I’ve always wanted to make the chime sound different or try and automate it in some way but it was a back-burner project. Recently though my wife starting working from home and the chime is disrupting online meetings. It’s loud and then the dogs bark and scramble for the door, not the most professional.
I decided to finally tackle it and see if I could replace the chime with an ESP32 to provide more flexibility and automation behind the simple push button.
Home Assistant Update Notifications
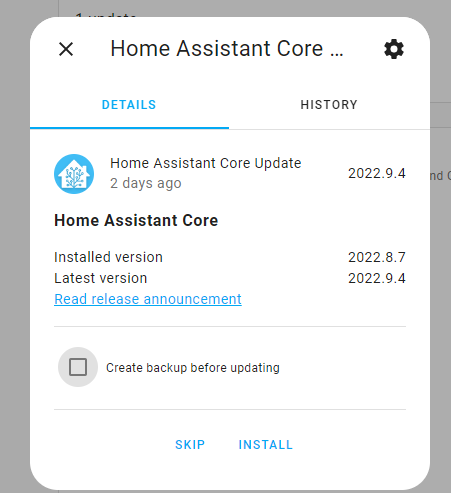
Starting with version 2022.4, Home Assistant has support for Update entity types. Using this entity type, devices (or Home Assistant itself) can let the user know of updates to software and firmware. At it’s most basic level this acts as a binary sensor to tell you if an update is available (when on). The update entity also has lots of information such as the currently installed version, the new version available, release notes URL, additional service calls and much more.
The documentation for the Update entity includes a basic automation for how to receive notifications for when an update is available. The problem with this example is it only works for a specific Update entity (like Home Assistant Core updates). I wanted a solution to let me know when an update to any update entity was available. I found this can be done with a bit of thought and a Template sensor.

Homemade Dynamic DNS
In my home lab I have a handful of services that need to be accessed from outside the house via the internet. For me Home Assistant is my number one need but there are others. Of course the problem with this is that a residential ISP doesn’t give you a static IP so your outside address changes every so often. What usually ends up happening in these situations is that to get a static IP you need to upgrade your internet plan or pay some additional monthly fee - which I of course don’t want to do. Dynamic DNS is supposed to solve this problem. The idea is you setup a static host record and then update the IP it points to when your DHCP address with your ISP changes.
Dynamic DNS is pretty easy to nail down and there are probably hundreds of services that do it. You can even get routers with the ability to do it built in. My specific problem with these services is that you often get a really weird URL like hostname.dynamicservice.com. Nothing wrong with that if you’re getting this service for free but the second you want to add something additional, like a custom domain or SSL cert, you have to start paying the dynamic DNS service. I don’t want to pay them either! I want my cake and I want it for free.
EPD Slideshow Bash Script
Like a lot of people lately, I wanted to display some of the new images from the James Webb Telescope. I have an electronic paper display (EPD) connected to a Raspberry Pi on my desk and figured that would be a cool way to see them as a rotating slideshow. Not wanting to spend a lot of time configuring a special image viewer I hacked together a 26 line Bash script to rotate through the images. You can easily get this done in a variety of ways but this serves as a good example of using Open Source libraries to do some heavy lifting and making quick work of a simple idea.

Trash Panda - A Simple Monitoring Project
In my home lab we’ve come to rely on a number of services such that downtime on any one of them could cause a brief panic. Things like our MythTV server for watching over-the-air TV, PiHole server for DNS, or our Home Assistant automation system. Just like in a business production system there are a myriad of things that could go wrong with even simple home VMs. Stuff like filling up HD space, services not running that should be, or maybe an OS update hosed something. I’ve lost count of the number of times I decided to “apply patches quick” only to find out some library was now missing that used to be there and now service XYZ just won’t start anymore. This is annoying for me but basically kills any good will I have with my family just trying to just browse the internet on their tablets.
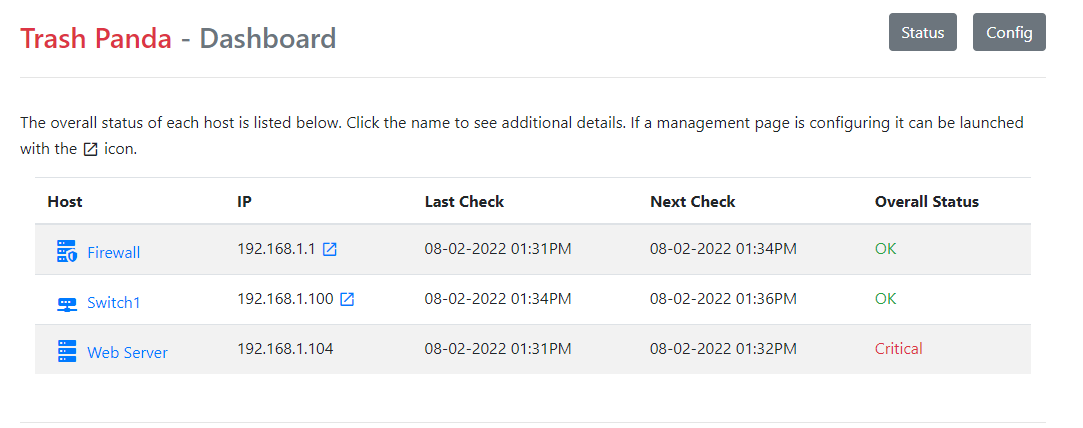
Suffice it to say I wanted a dashboard and notification system to give me some assurance things are working properly. In my professional life I’ve used a number of monitoring systems over the years. There are great open source and commercial products available that will monitor services and alert you when things are going wrong. Because I apparently do everything the hard way I decided to build one instead. In my defense my initial thoughts were that I didn’t need all the overhead of a true monitoring solution. All I really wanted was some up/down status information. I should be able to Python my way there pretty quickly and just be done with it right? Behold, the Trash Panda monitoring system.

Dislaimer - at the outset I’m going to say I don’t think anything in this project is groundbreaking or couldn’t be done with existing software. It was more of a “can I do it” kind of project. In this write-up it’s more about trying to document the process than the actual result. This is basically the workflow I use for any new project.
Command Line Backups
In most cases there is no reason to re-invent the wheel, and there are already tons of great backup solutions. Just Google it.. These run from full bare metal backups to file based backups that include rotating incrementals. Most include awesome client/server architecture or some type of web based GUI.
As seems to often be the case with my projects, I didn’t need any of this. I wanted a solution that on the surface was so simple it was the kind of thing others flew past on their way to a real solution. Something simple enough it wasn’t worth maintaining a project for it but yet complex enough that it wasn’t just boilerplate code.
Fun With Light Sensors
In our living room we have several very large windows that can let in a lot of light. We also have some lights with either LIFX bulbs or Z-Wave switches that we can control via Home Assistant. It seemed like a no-brainer to try and make a system to auto turn the lights on or off depending on the amount of light in the room. On overcast days, or during the winter when it isn’t light until 7:30am, we could have the lights turn on when we wanted them to and off again when the sun provided enough light in the room. With this very simple idea in mind I jumped down the rabbit hole of complications as our family started to run in to all the edge cases.
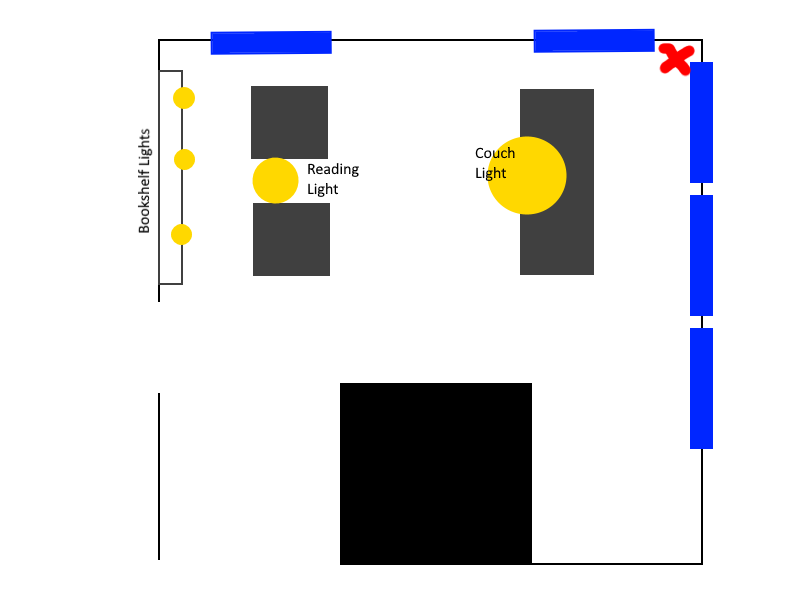
For reference, here is a basic diagram of our living room. There are 5 windows around the edge and 3 lights which labeled Couch Lights, Reading Light and Bookshelf Lights. In this project I’ll be controlling all of them, but under different circumstances and at different times.
The heavy lifting on the automation side is being done with ESPHome, light sensor compatible with ESPHome, and Home Assistant.

Building Custom LibreELEC Images
We use Kodi for a lot of our media center needs in our house. We have several TVs, each with their own Kodi box, configured to pull information from a centralized database and shared network storage. To run Kodi I’ve used pre-made LibreELEC images. LibreELEC is “just enough OS” system that is designed to run Kodi within a stripped down Linux OS designed just for that purpose. It also layers in some additional patches and features that make the whole experience easy to work with.
I’ve also been following work on Kodi’s RetroPlayer project. This is an integration with Kodi and the excellent RetroArch system for game system emulation. Out of the box Kodi has many RetroPlayer features built in; but the RetroPlayer project is often well ahead of what Kodi has merged into it natively. For a long time I was able to hunt down LibreELEC builds that included these enhancements but I’ve been having a hard time with that lately. I’ve decided to tackle building my own custom LibreELEC builds that incorporate the latest RetroPlayer releases.
